The diagram below shows how a well program object can be added to the wellbore from the operational view:
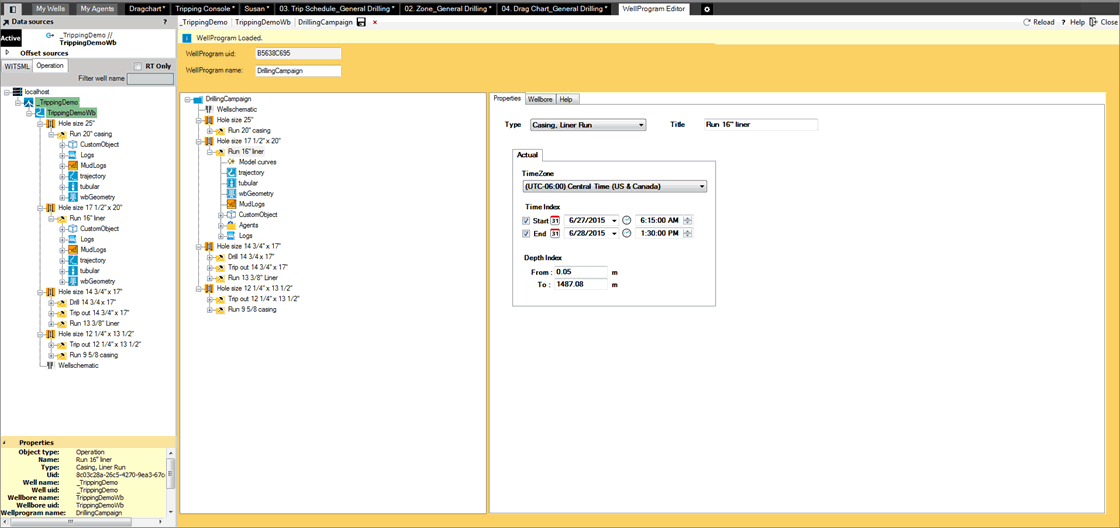
Operational View can be accessed using the Operation tab. The Operation tab is found next to the WITSML tab on the Sidebar. Operational View enables the viewing of WITSML objects in the context of the relevant rig operation. Operational View includes user defined operations such as: Drilling, Run casing, etc., and the association of these operations to: start and end time and depth; which make it possible to focus on the data from a specific time/depth period by setting the operation as the data source.
Example: If the user defined an operation
“run casing” and then later set this operation as the data source, the
relevant widgets will show data from the time frame defined by the operation.
Many widgets already support this workflow, including the log widget and
the tripping console widgets. An underlying well program object powers
the operational view. The well program object will contain a list of hole
sections, operations etc., and this will then be displayed in the operational
view.
The diagram below shows how a well program object can be added to
the wellbore from the operational view:

Operational
View functionality includes:
Context menu option to create a new wellprogram for a specific Wellprograms node
Context menu option to edit the wellprogram for a specific wellbore
Add or Edit options for holesections and operations
Drag and Drop functionality for Wellbore objects
Edit
able Start index
and Depth
index
Operational
View includes an editor which enables the ability to add, update and delete
options for hole sections and operations related to a specific wellprogram.
The Wellprogram tree found in
the editor's right hand pane, displays group objects as hole sections
and operations. A complete operation or holesection for a wellprogram
is found in the left hand pane using three tabs: Info, Properties, and Wellbore. Both
runs and non-run based operations are supported in Operational View.
The operational view can be updated in two ways:
Manually by using Wellprogram editor options in operational view
Starting the casing run agent. When a casing run agent starts, the casing run agent will link the required curves in the drilling program object
and
the operational view
will be refreshed.
To create a wellprogram, perform the following actions:
1. Right-click the wellbore node in the WITSML
tree and select Add
WellProgram. The wellprogram editor displays .
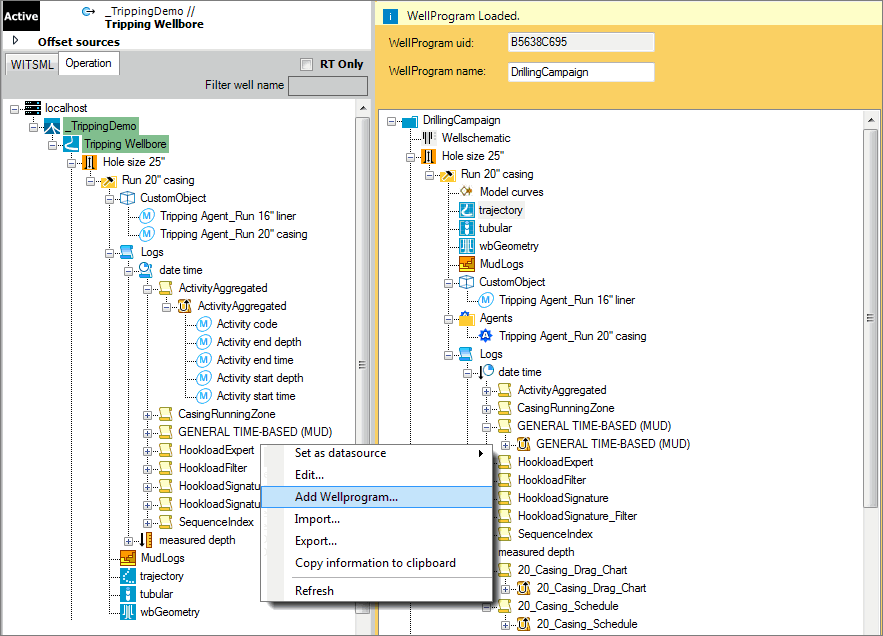
2. A default WellProgram UID and WellProgram Name
displays.
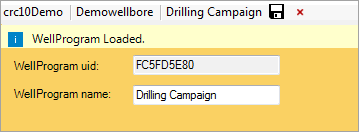
3. In the Wellprogram
name field, enter the name
of the new wellprogram.
4. Click Save.
Note: Only one wellprogram per
wellbore can be created. Attempting to create another wellprogram
for a specific wellbore is not recommended. Once a wellprogram is
created with the appropriate hole sections. and operations, ensure that
the new Tripping
Agent is configured.
To edit a wellprogram, perform the following actions:
1. Right-click the existing wellbore in Operational View.
2.
On the Context menu, click Edit
WellProgram. This option
only exists when a WellProgram has been pre-defined for the Wellbore.
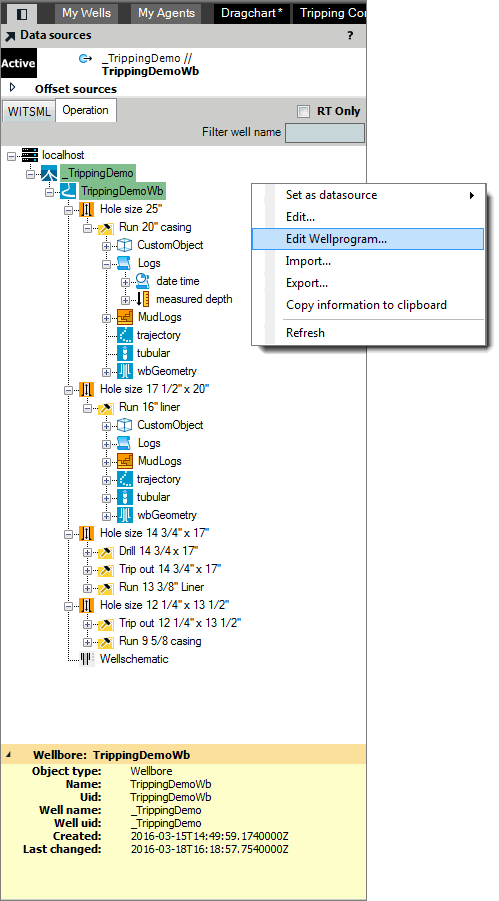
3. The
WellProgram
Editor displays with
options to save
and delete
a wellprogram.
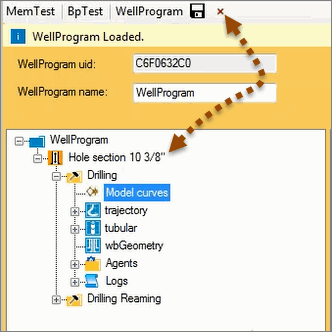
|
Notes |
| Save | Save all changes made to the WellProgram. |
| Delete | Delete the WellProgram, including all objects related to the WellProgram |
To create
a hole section, perform the following actions:
1. In the Wellprogram
tree, right-click the appropriate
wellprogram node.

2. On the Context menu, select
Add new
hole section…
The following dialog will pop up:


4. Select or type the appropriate holesection.
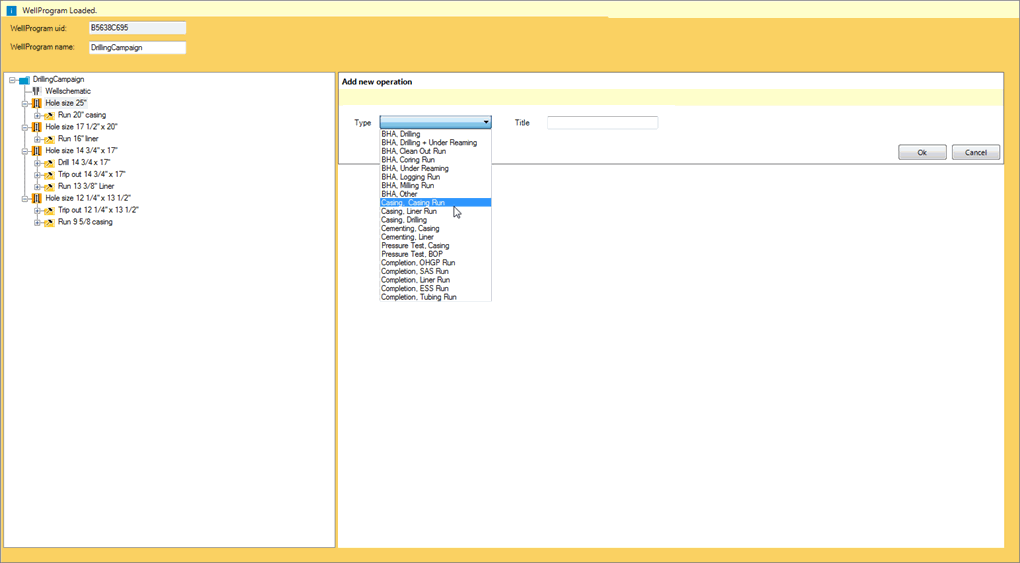


6. Click the Properties tab
and provide operation details such as: Type,
Title, Time Zone, Time Index, and Depth
Index.
Note: An operation may have
undefined start and end time/depth at the time the wellprogram is created,
because it is not known when a certain operation will commence. The start
and end times of different operations are not allowed to be overlapping.
Operational View is currently designed
for use with the Tripping Console; future releases may be extended for
use with other consoles as well. To start the Tripping agent on
the operation, it is required that at a start time of the operation is
specified. The Tripping agent will start to process data from this start
time. The end time of the operation may be left undefined, but in
order to avoid overlapping operation times, the agent is only allowed
to have one operation with a defined start time and undefined end time.
The current operation being processed is typically left with an undefined
end time. Once the Tripping agent is stopped manually or when it is stopped
because the Auto-Terminate
criteria is satisfied, it will update the end time of the operation if
it is undefined, and it will also update the start and end depth of the
operation. The start and end depth of the operation will then
be set to the minimum and maximum depths of the operation.
Note:
The start and end time/depth of a holesection will also be updated automatically
by the Tripping agent. If the start and end times of an operation
has already been defined, the Tripping agent will only process the data
within that timeframe.
Note: The Tripping agent need to be re-started in the midst of an ongoing operation, you may have to edit the well program before the agent is started again. The reason for this is that the Tripping agent will only process data till the end time of the operation, and if the agent was terminated pre-maturely, the end time might be set too early. To correct this and enable the agent to run on live data, you may un-check the checkbox next to the end time of the operation.
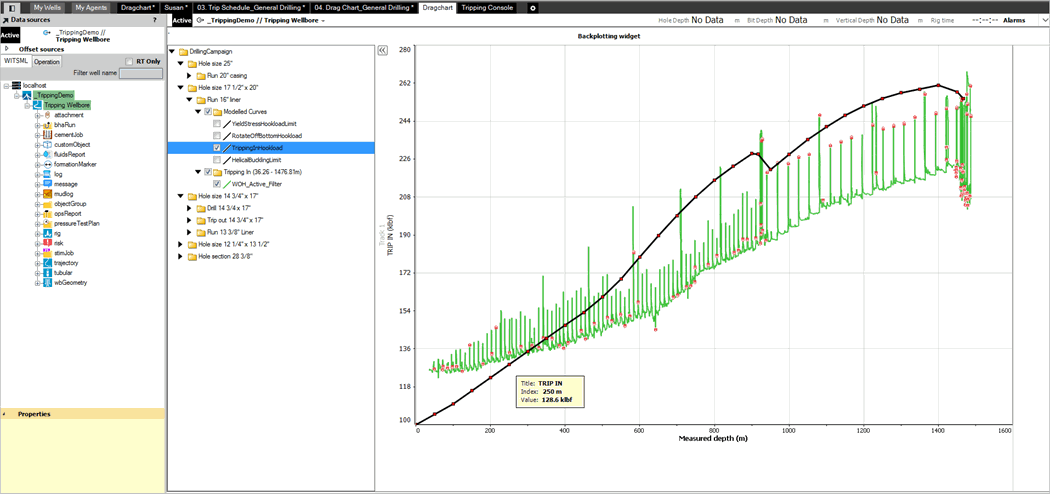
Currently,
the Backplotting
widget supports viewing of modelled curves. In the Backplotting widget,
the user can choose to automatically view modelled curves of certain types
if they are defined in the wellprogram.
The following modelled curves are automatically used by the Tripping agent
if they are defined, and it will be used to calculate traffic light output
for the Zone widget:
These curves can also be automatically picked up and visualized in the
backplotting widget if configured.

To use Model Curves perform the following
actions:
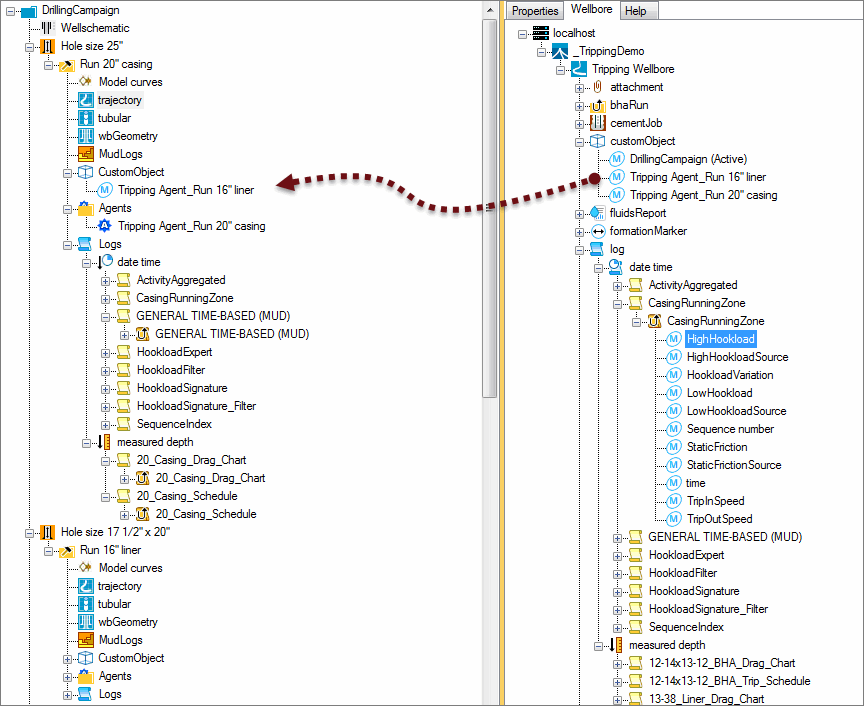
1. The Model Curves node in the Well Program is pre-populated
when a new Operation is created
for the Well Program.
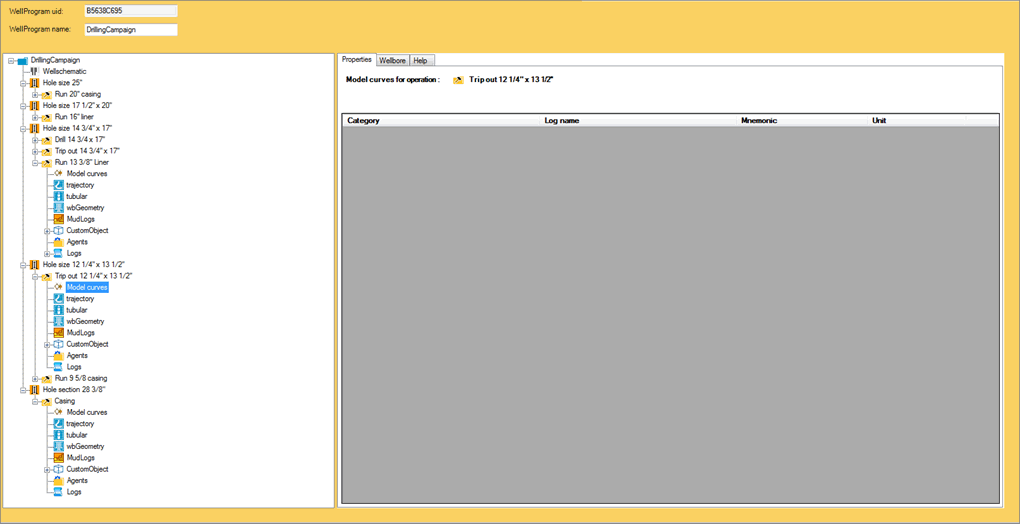
2. Model Curves functionality
is available once curves have been imported into the Wellbore. The Wellbore
node is indicated as log will
display the imported Model Curves.
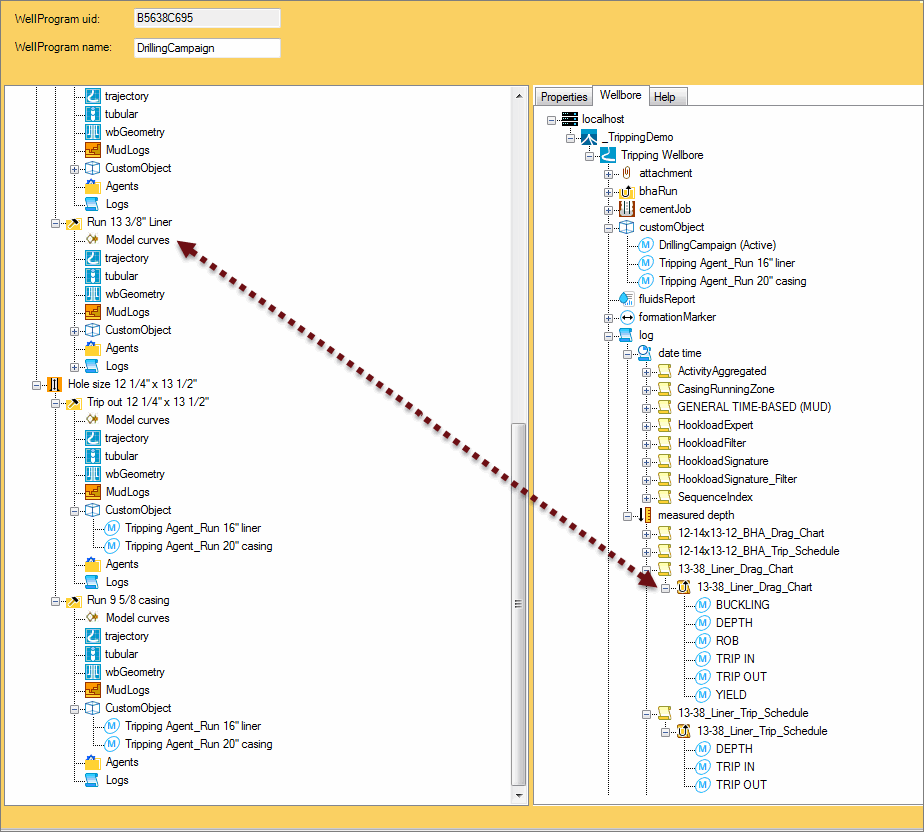
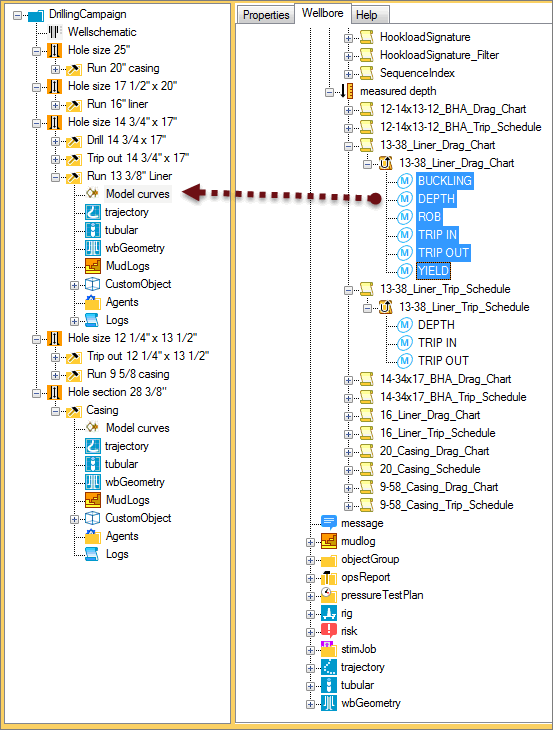
3. To implement the Model Curves, drag and drop the Model Curves from the Wellbore log node, found by clicking Wellbore tab, into the Model Curves node found in the appropriate Well Program Operation.
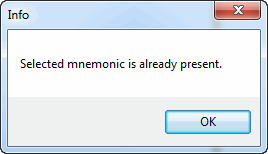
Note: The following error
message will display when a Selected
Mnemonic exists for the Model Curve.
4. Click the Properties
tab to display the Model Curves
properties.
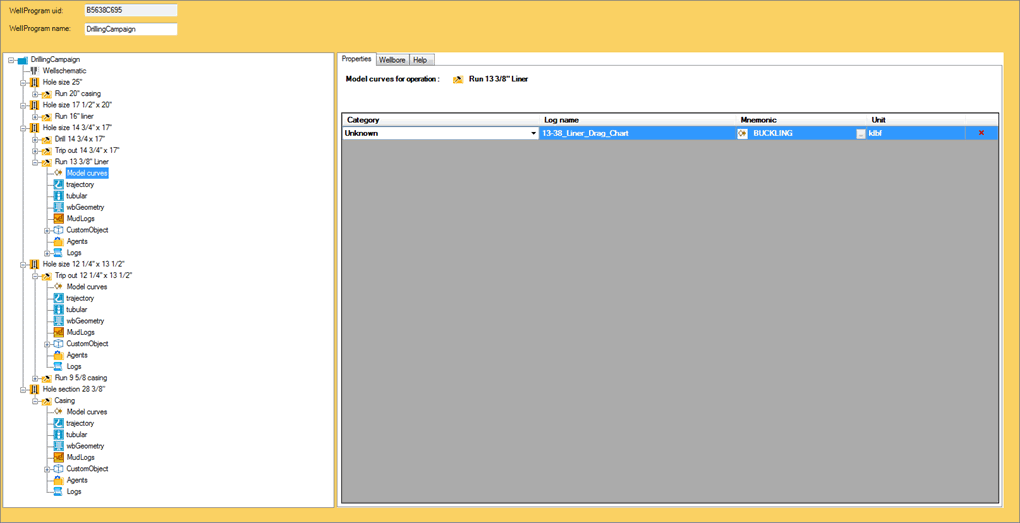
5. In the Category column,
set the appropriate category for the Model
Curves as needed. The Log
name, Mnemonic and Unit should be pre-populated based
on pre-set Tripping Agent settings.
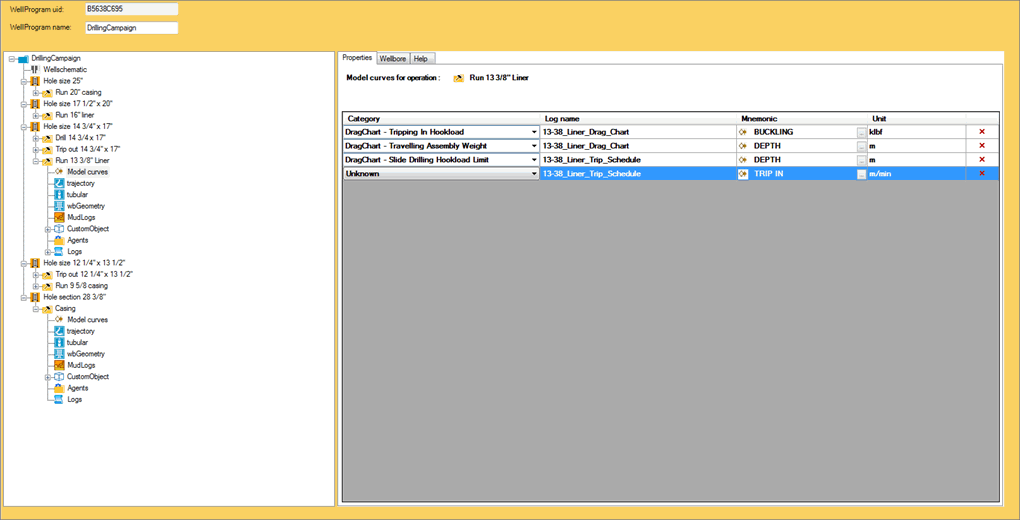
Note: When setting Categories for a Model
Curve, selecting the same category twice will return the following
user message:

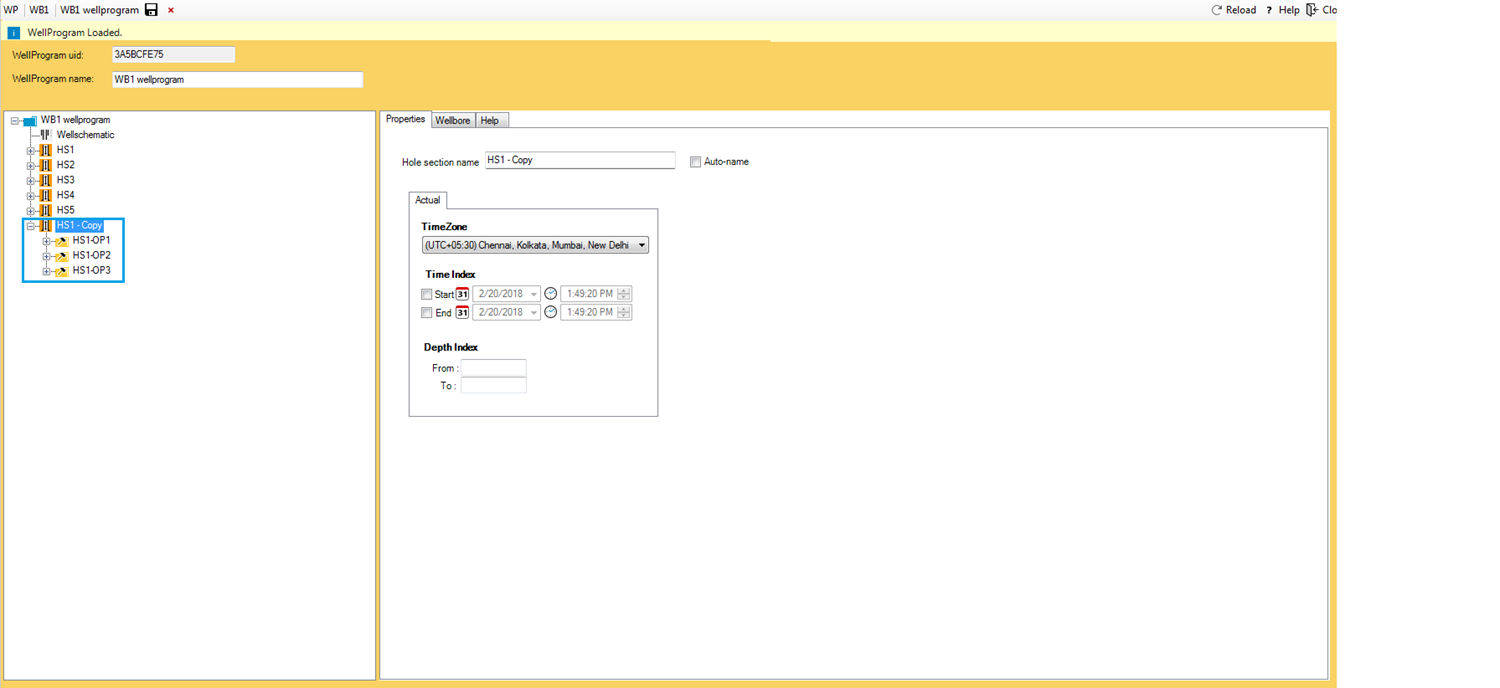
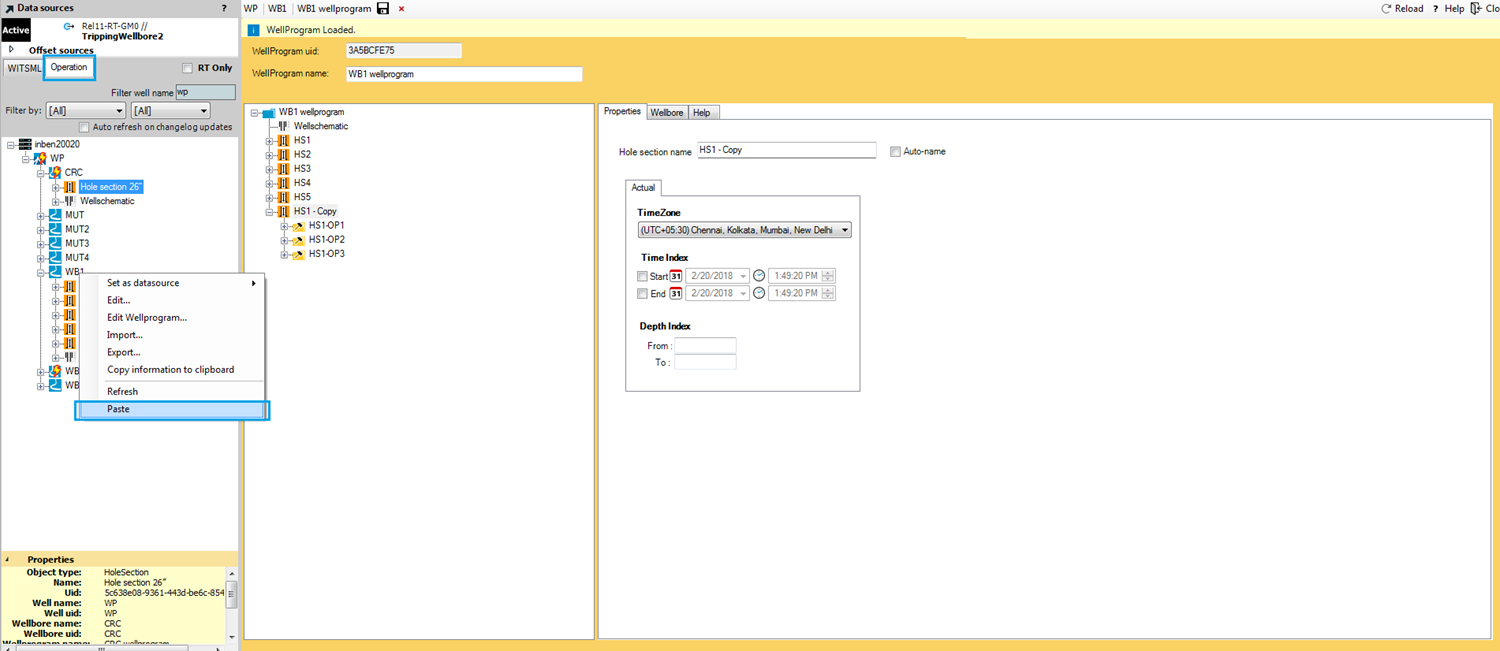
User is allowed to copy and paste or drag and drop Hole section(s) and Operation(s) to same wellbore via wellprogram editor and to another wellbore via Operations tree view.
Altogether,
you have four options to perform these actions:
Drag and Drop the Hole section(s)/Operation(s) to same wellbore
Copy and Paste the Hole section(s)/Operation(s) to same wellbore,
Drag and Drop the Holesection(s)/Operation(s) to another wellbore
Copy and Paste the Holesection(s)/Operation(s) to another wellbore
To drag and drop the Hole section(s)/Operation(s) to same wellbore, follow these steps:
Go to the operational view and open the Wellprogram Editor.
Select the Holesection(s)/Operation(s) that you want to copy.
Drag the selected item and drop it to the node under which you want to copy the item.
To copy and paste the Hole section(s)/Operation(s) to same wellbore, follow these steps:
Go to the operational view and open the Wellprogram Editor.
Select the Hole section(s)/Operation(s) that you want to copy, right click and select ‘Copy’
Paste it to the node under which you want to copy the item.
To drag and drop the Holesection(s)/Operation(s) to another wellbore, follow these steps:
Go to the sidebar ‘Operation’ tab.
Select the Holesection(s)/Operation(s) that you want to copy.
Drag the item and
drop it to another wellbore under which you wan to copy the item.
To copy and paste the Holesection(s)/Operation(s) to another wellbore, follow these steps:
Go to the sidebar ‘Operation’ tab.
Select the Hole section(s)/Operation(s) that you want to copy, right click and select ‘Copy’
Paste to another wellbore under which you want to copy the item.
Model curves settings (except data) associated with selected operation will be copied. No other associated objects will be copied. See the images below:
Both Time and depth indexes will be blank in copied hole sections and operations.
Note: User cannot Drag or copy operations to another wellbore which does not have wellprogram.